The switch statement in Swift is used to execute a particular block of code based on multiple conditions. A switch statement is useful for more than one condition. For one or two conditions, if-else is a better option but for conditions more than that, a switch statement is a better option.
We will try to understand the flow of switch statement in detail but let’s try to understand its basic syntax first.
The switch statement begins with a switch keyword followed by an expression based on which the cases will be evaluated.
The expression is followed by different cases and the code block for each case.
If none of the cases matches, the default block will be executed.
The basic syntax will look like below.
switch (expression)  {
  case value1:
    // statements

  case value2:
    // statements

  ...
  ...

  default:
    // statements
}
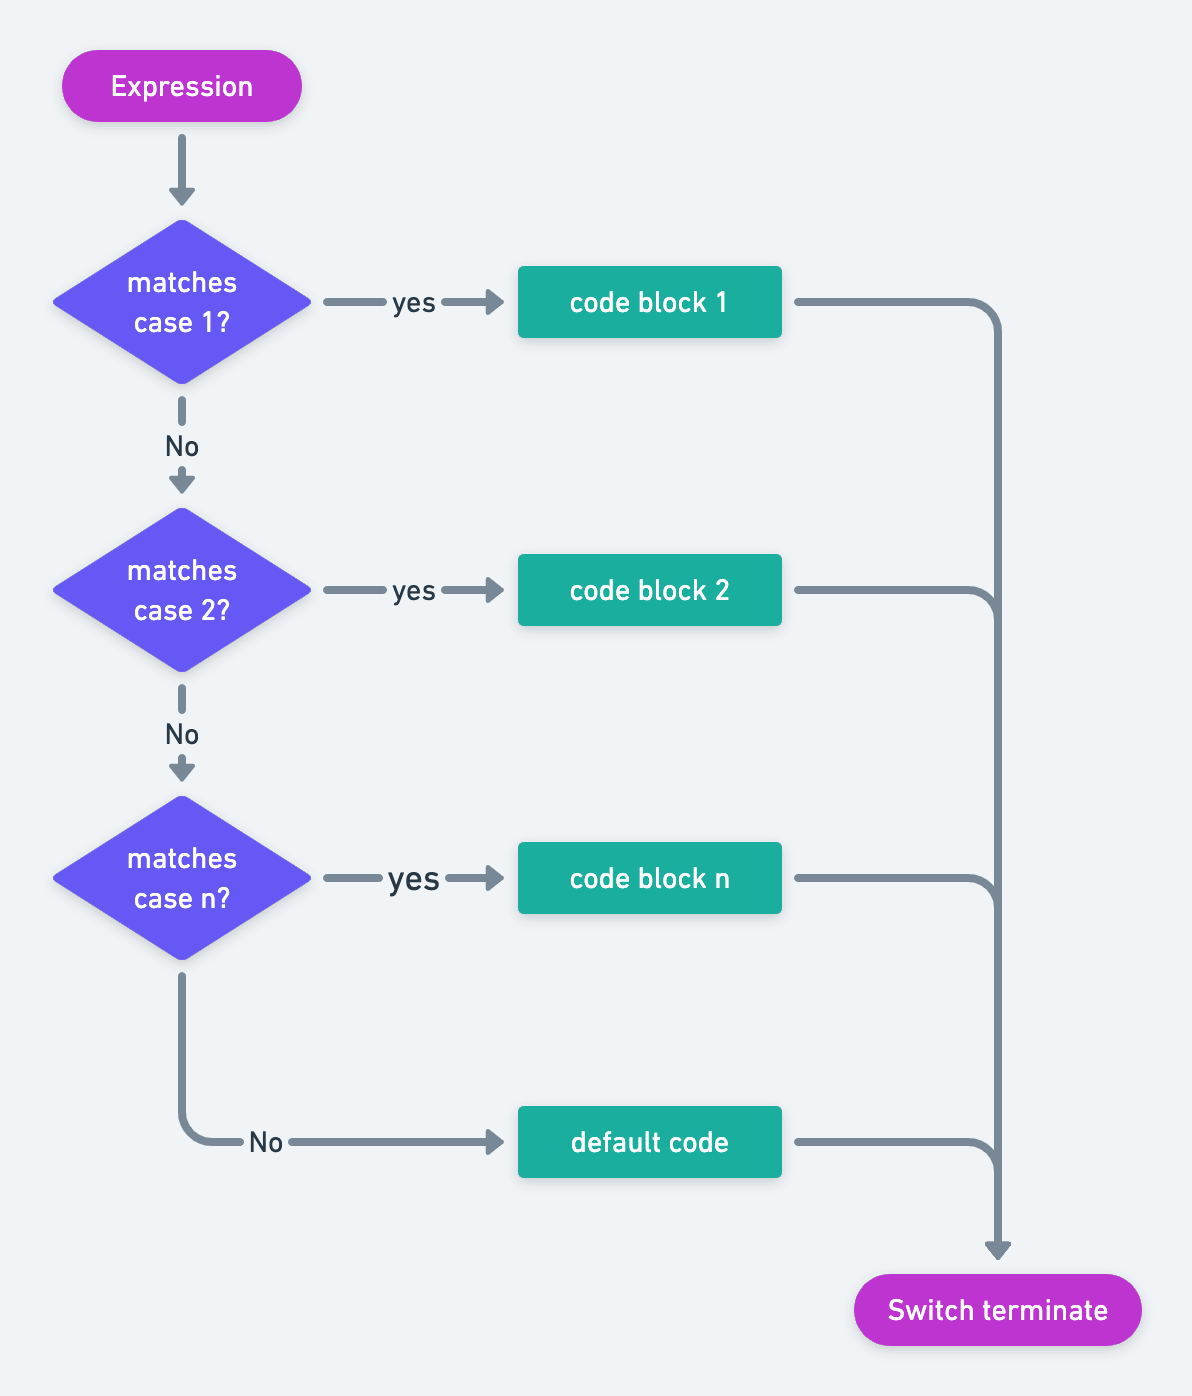
Let’s try to understand it with a flow chart before taking an example.
The below flow chart explains the basic flow of a switch statement which starts with an expression followed by cases. If the condition matches, the code block for that case will be executed. If non of the cases match, the default case will be executed.

Now let’s see an example for the switch statement.
let dayOfWeek = 2

switch dayOfWeek {
  case 1:
    print("Monday")

  case 2:
    print("Tuesday")

  case 3:
    print("Wednesday")

  case 4:
    print("Thursday")

  case 5:
    print("Friday")

  case 6:
    print("Saturday")

  case 7:
    print("Sunday")

  default:
    print("Invalid day")
}

//this will print
//Monday
Things to notice here
- Like other languages, there is no need for a
breakstatement in the cases. - There is no limit on the number of cases.
- No case can be empty, at least one line of executable code should be there otherwise the compiler will throw the below error.
error: case label in a switch should have at least one executable statement
- The default case is a must until the switch case is on an enum and/or all cases are exhausted otherwise the compiler will through the below error.
error: switch must be exhaustive
note: do you want to add a default clause?
Switch Statement with fallthrough
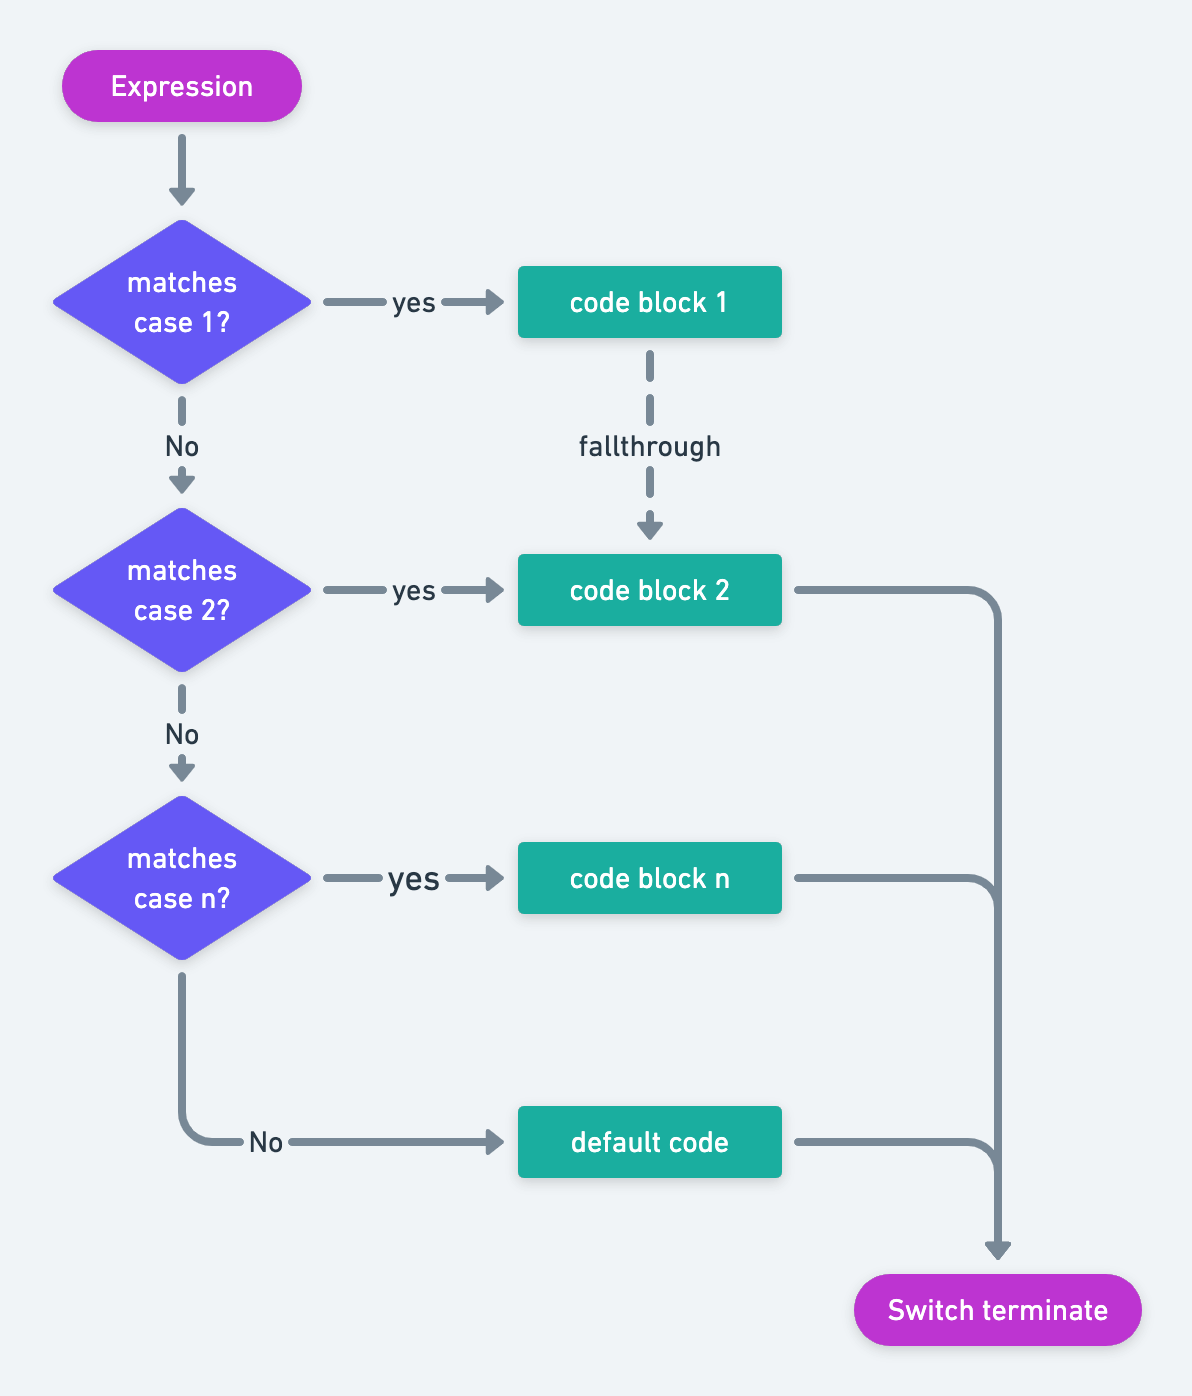
The fallthrough is being used in the switch cases where we want the compiler to enter into the next case also even if the condition is not true. Usually, for the situation where we want to execute some common code for two switch cases, we can use fallthrough.
let dayOfWeek = 6

switch dayOfWeek {
  case 1:
    print("Monday")

  case 2:
    print("Tuesday")

  case 3:
    print("Wednesday")

  case 4:
    print("Thursday")

  case 5:
    print("Friday")

  case 6:
        fallthrough
  case 7:
    print("Its a holiday")

  default:
    print("Invalid day")
}

//this will print
//Its a holiday
The fallthrough can also be replaced with comma-separated cases, where the same code block will be executed for both the cases, but in the case of fallthrough, some extra line of code can be added for the above case before moving to the next case code block.
let dayOfWeek = 6

switch dayOfWeek {
  ...

  case 6, 7:
    print("Its a holiday")

  default:
    print("Invalid day")
}

//this will print
//Its a holiday
Let’s try to understand fallthrough with a flow chart.

Switch Statement with Range Operator
A switch statement can be clubbed with range operators.
Below is the example for the same.
let marks = 30

switch marks {
  case 90...100:
    print("Wonderful")

  case 70..<90:
    print("Very Good")

    case 35..<70:
    print("Scope of improvement")

  case ..<35:
    print("Need immediate attention !")

  default:
    print("Invalid Marks")
}
Switch Statement with Tuple
A switch statement can be clubbed with Tuple also where both the values need to match in order to execute any case code block.
Below is the example for the same.
let user = ("Suneet", 30)

switch user {
  case ("Suneet", 30):
    print("Suneet user found")

  case ("Agrawal", 30):
    print("Agrawal user found")

  default:
    print("Unknown user")
}
Please keep in mind, in the case of a tuple, both the values should match for any case to be executed.
